If you want to improve your podcast sound quality without spending more on mics, focus on optimizing your room acoustics. Use affordable DIY treatments like foam panels, blankets, or rugs to absorb echoes and reduce background noise. Strategic placement of these materials can make a big difference in clarity and professionalism. By creating a better environment, you’ll get cleaner recordings and save time editing. Keep exploring—there are even more effective room tricks to learn.
Key Takeaways
- Proper room acoustics and treatment can significantly improve sound quality more effectively than simply upgrading microphones.
- Strategic placement of acoustic panels and diffusers reduces reflections and echo, enhancing clarity without additional gear.
- DIY treatments like blankets, foam panels, and rugs are cost-effective solutions for better sound control.
- Addressing room reflections and external noise sources creates a professional environment, minimizing the need for more expensive mics.
- Long-term acoustic optimization streamlines editing and delivers consistent, high-quality audio, outperforming the benefits of buying new microphones.

Focusound 52 Pack Acoustic Foam Panels 1" x 12" x 12" Sound Proof Foam Panles Soundproofing Noise Cancelling Wedge Panels for Home Office Recoding Studio with 300PCS Double-Side Adhesive
Soundproofing – Acoustic foam panels triangular grooves structure for better noise absorption, helps to reduce and absorb unwanted…
As an affiliate, we earn on qualifying purchases.
As an affiliate, we earn on qualifying purchases.
Why Good Room Acoustics Are Key for Podcast Quality

Good room acoustics are vital because they directly impact the clarity and professionalism of your podcast. Your podcast studio design should prioritize sound quality, ensuring that your voice is captured cleanly. Proper speaker placement is essential; position your speakers so sound disperses evenly without causing reflections or dead spots. A well-designed space minimizes echo and background noise, making editing easier and your audio more engaging. Think about using furniture, rugs, or acoustic panels strategically to absorb or diffuse sound. This thoughtful setup creates an environment where your voice sounds natural and clear, boosting overall podcast quality. Additionally, proper motor mounts can further enhance sound isolation, preventing vibrations from interfering with your recordings. Remember, investing in good room acoustics saves you time and effort in post-production and leaves a lasting impression on your audience. Furthermore, consider how crisping techniques can enhance the overall auditory experience by ensuring clear sound quality. Additionally, understanding digital content formats can help you explore innovative ways to present your podcast, making it more appealing to listeners. Incorporating data storage solutions for your recordings ensures that your valuable content is securely backed up and easily accessible.

VEVOR Sound Dampening Blankets, Soundproof Curtains with 80 x 48 in, Soundproof Blanket with Grommets, Studio Grommeted Blanket, for Window, Door, Light Blocker, Music Recording, Black
Sound Absorption & Noise Reduction: Made with a polyester woven surface and recycled cotton filling, this 3-layer physical…
As an affiliate, we earn on qualifying purchases.
As an affiliate, we earn on qualifying purchases.
Common Sound Issues in Podcast Rooms: Echo, Reverb, Background Noise
Many common sound issues in podcast rooms—such as echo, reverb, and background noise—can markedly degrade audio quality if not addressed. Echo and reverb make your voice sound distant, while background noise distracts listeners. To combat these problems, consider adding soundproof curtains to block external sounds and absorb reflections. Diffusion panels scatter sound waves, reducing harsh echoes and creating a balanced acoustic environment. Here’s a quick overview:
| Issue | Solution | Effect |
|---|---|---|
| Echo | Diffusion panels | Breaks up sound reflections |
| Reverb | Soundproof curtains | Absorbs excess sound waves |
| Background Noise | Soundproof curtains | Blocks external noise |
Implementing these treatments helps clear your audio, making your recordings crisp and professional.

Acoustic Levitator DIY Kit with Stable Foam Easy to Assemble Suspension Module for Electronics Enthusiasts & STEM Education
[Educational] Ideal for school education practice, this kit combines fun with hands,on learning. gain a deeper understanding of…
As an affiliate, we earn on qualifying purchases.
As an affiliate, we earn on qualifying purchases.
How to Detect Echo, Reverb, and Noise in Your Space

To improve your podcast sound, you need to spot echoes, reverb, and background noise in your space. Pay attention to how your voice sounds during recordings and listen for any lingering reflections or unwanted sounds. Simple techniques like recording test clips and listening carefully can help you identify these issues quickly. Additionally, understanding the importance of room treatment can significantly enhance your audio quality. Implementing effective recovery techniques can also help you maintain vocal clarity and reduce strain during long recording sessions. Consider using landscaping techniques to create a more acoustically friendly environment in your recording space. A great way to discover innovative solutions is through high-signal startup ideas, which can inspire unique approaches to sound treatment. Utilizing the principles of essential oils for respiratory health can also create a more comfortable atmosphere, promoting clearer vocal delivery during recordings.
Spotting Echoes and Reverb
Have you ever noticed a strange lingering sound or an echo when recording in your space? That’s a sign of poor echo detection. Echoes and reverb can make your audio sound distant or muddy. To spot these issues, clap loudly or speak sharply and listen closely. If you hear a prolonged, bouncing sound after you stop speaking, reverb is present. Ambient noise, like distant traffic or HVAC hum, can also contribute to the overall echo effect. Pay attention to how your voice interacts with the room. If it sounds like it’s bouncing around, you need to address the room’s acoustics. Utilizing acoustic treatment techniques can significantly improve your recording environment. Recognizing these cues early helps you identify problem areas before they ruin your recordings. Spotting echoes and reverb is the first step to creating a cleaner, more professional sound.
Identifying Background Noise
Ever wonder why your recordings sound less clear than expected? The culprit is often background noise or ambient sounds that sneak into your recordings. To identify these, listen carefully during playback or record a test clip in your space. Notice any unwanted sounds like humming, air conditioning, or distant chatter. These are signs of background noise that can muddy your audio. Additionally, understanding lactose intolerance can help you recognize how certain dietary choices might affect your recording clarity if you’re experiencing discomfort while recording.
| Sound Type | How to Detect |
|---|---|
| Echo & Reverb | Listen for lingering reflections after speaking |
| Ambient Sounds | Notice consistent background noises like fans |
| Overall Noise | Detect low-level hums or hisses in recordings |
Recognizing these issues helps you target specific room treatments to improve clarity.
Using Simple Detection Techniques
Detecting echo, reverb, and noise in your space doesn’t have to be complicated; simple techniques can help you identify these issues quickly. Start by recording a short test clip of your voice or sounds in the room. Play it back and listen carefully for echo detection—notice if your voice sounds distant or like it’s bouncing off walls. Listen for background noise, which can be constant hums or hisses, indicating poor soundproofing or equipment issues. Clapping your hands loudly can help reveal reverb—if the clap sounds prolonged or echoing, your room likely needs treatment. These straightforward checks allow you to pinpoint problem areas, so you can focus your room treatment efforts effectively and improve your podcast sound quality.

(2 Pack) — Sound Acoustic Studio Diffuser «Sirius» | 2D QRD | Diffusion – Reflection – Absorption – Soundproofing – Insulation | Wall Art Panel | (20"x20"x6" (50x50x15.3cm), Cherry)
APPLICATIONS: Ideal for optimizing sound quality in recording studios, home theaters, music rooms, and other spaces where acoustic…
As an affiliate, we earn on qualifying purchases.
As an affiliate, we earn on qualifying purchases.
Affordable Room Treatments Every Podcaster Should Know
You can improve your recording quality without breaking the bank by using strategic placement techniques for sound absorption. DIY sound absorbers, like hanging blankets or foam panels, are easy and affordable options to reduce echo and reverb. With a little creativity, you can transform your space into a more professional-sounding podcasting environment. Additionally, consider the impact of proper cabling solutions on your overall audio setup, as cable management can significantly enhance sound clarity. Implementing necessary cookies on your website can also ensure a smoother user experience, allowing you to focus more on your content. Moreover, using wearable tech can help monitor your vocal performance and adjust your recording environment accordingly. To further enhance your setup, remember that effective soundproofing methods can significantly reduce external noise interference, improving the overall quality of your recordings. Incorporating early detection strategies can also help you identify potential issues with your audio setup before they become problematic.
Strategic Placement Techniques
Strategic placement of affordable room treatments can dramatically improve your podcast’s sound quality without breaking the bank. By carefully positioning panels and bass traps, you create opportunities for creative soundscaping that enhance clarity and warmth. Place treatments near sound sources and reflective surfaces to maximize ambient noise control, reducing echo and harsh reflections. In corners, bass traps absorb low frequencies and prevent muddiness, while wall-mounted panels target mid and high frequencies. Additionally, consider the watt-hours of your battery inverter generator when planning your recording sessions to ensure you have enough power for your equipment. Effective indoor air quality, including humidity control, can also contribute to a more comfortable recording environment. Understanding consumer deals when purchasing your treatments can help you save money while optimizing your setup. To further enhance sound quality, consider acoustic treatment principles that help reduce sound distortion and improve overall recording clarity. Avoid cluttering your space; instead, experiment with placement to find the sweet spot where sound feels balanced. This thoughtful approach guarantees your recordings are cleaner and more professional, all while keeping costs low. Effective placement is your secret weapon for achieving studio-quality sound through simple, affordable room treatments. Additionally, prioritizing your emotional well-being as a caregiver can further enhance your focus and creativity while podcasting.
DIY Sound Absorbers
Creating your own sound absorbers is an effective way to improve your podcast’s acoustics without spending a fortune. DIY soundproofing options, like homemade foam panels, can markedly reduce echo and background noise. With some basic materials and a bit of creativity, you can craft cheap yet effective acoustic treatments. Regular maintenance of your equipment, much like a car’s upkeep, ensures optimal performance and longevity. Imagine transforming your space into a professional-sounding studio with simple, affordable solutions. These DIY foam panels not only save money but also give you control over your room’s sound quality. Additionally, just as drone bees play a crucial role in maintaining hive stability, your sound treatments can significantly enhance your podcast’s overall quality. Understanding sound acoustics is essential for creating an effective podcast environment.
| Creative Soundproofing Ideas | DIY Foam Panel Benefits |
|---|---|
| Use recycled materials | Cost-effective |
| Customize size & shape | Easy to install |
| Personalize aesthetics | Improves audio clarity |
Take charge of your space and elevate your podcast’s sound today!
DIY Acoustic Treatments to Improve Your Sound on a Budget

Improving your recording sound doesn’t have to cost a fortune; with some DIY acoustic treatments, you can considerably reduce echo and background noise on a budget. Simple materials like thick blankets, foam panels, or even DIY bass traps made from household items can make a noticeable difference. These treatments enhance your podcast aesthetics by creating a cleaner, more professional sound environment, which boosts listener engagement. Positioning these DIY solutions strategically—like behind your mic or along reflective walls—maximizes their effectiveness. You don’t need expensive equipment; rather, focus on making your space sound-friendly with affordable, easily accessible materials. This approach not only improves audio quality but also helps establish a consistent, appealing podcast aesthetic that keeps listeners hooked.
When to Invest in Professional Room Soundproofing and Treatment

Knowing when to invest in professional room soundproofing and treatment is essential for taking your podcast to the next level. If you notice persistent echo, outside noise leaks, or inconsistent sound quality, it’s time to think about expert help. Here are signs to watch for:
- Your recordings capture more ambient noise than desired, despite DIY fixes.
- Soundproof curtains and furniture placement haven’t sufficiently blocked outside noise or reduced echo.
- You’re ready to create a professional-grade environment for better consistency and clarity.
Investing in professional soundproofing can include structural modifications and specialized treatments. These steps ensure your space minimizes sound bleed, improves acoustics, and provides a suitable recording environment, making your podcast sound polished and professional.
Setting Up Your Space to Minimize Sound Problems

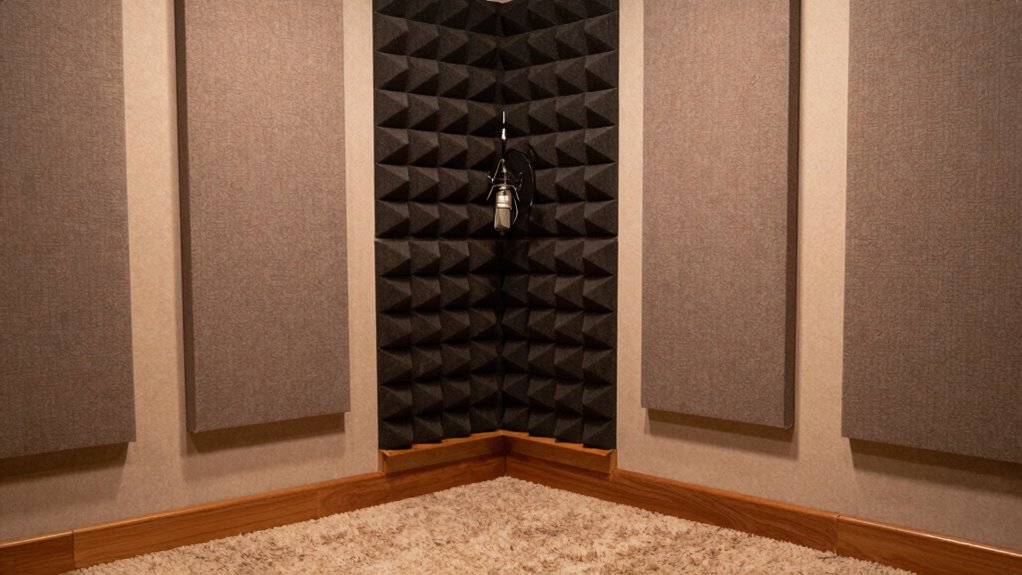
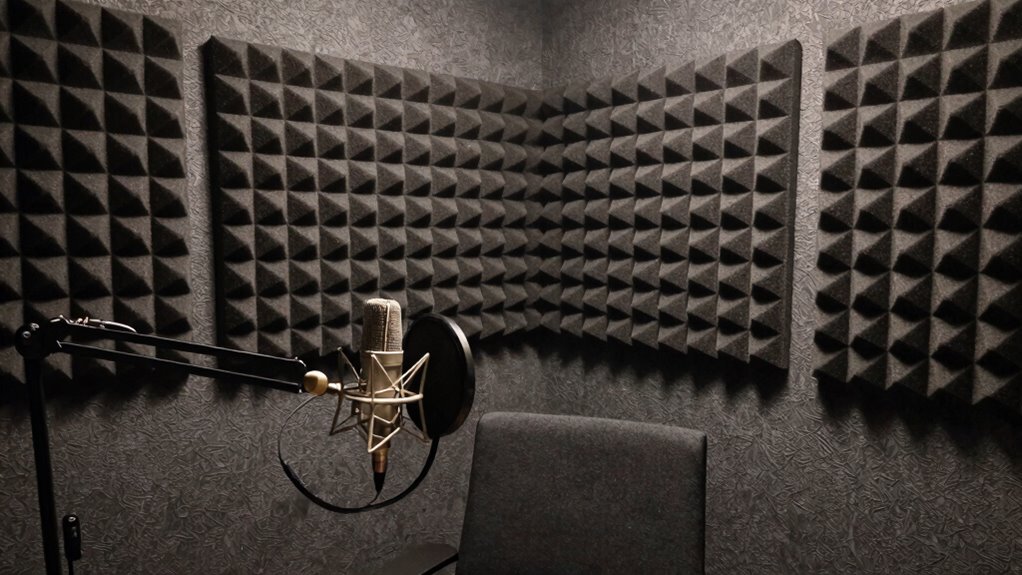
To reduce sound issues, start by choosing a room wisely—preferably one away from busy areas and external noise. Use acoustic treatment techniques like foam panels or rugs to absorb sound reflections and prevent echo. With strategic placement and proper treatment, you’ll create a cleaner, more professional-sounding space for your podcast.
Strategic Room Placement
Your room’s placement plays a crucial role in producing clear, professional-sounding podcasts. To optimize your space, focus on how you position your equipment and decor. First, choose a corner or a small, enclosed area—these naturally reduce sound reflections. Second, incorporate studio decor like fabric panels or carpets to absorb sound, avoiding hard surfaces that cause echoes. Third, add soundproofing materials such as foam or mass-loaded vinyl around the room’s perimeter to block external noise. Keep your setup away from windows and high-traffic areas to minimize distractions. Proper placement minimizes sound problems without relying solely on equipment. By thoughtfully arranging your space, you create a controlled environment that enhances audio quality and makes your podcast sound more professional.
Acoustic Treatment Techniques
Once you’ve chosen the right spot for your recording setup, the next step is to implement acoustic treatments that reduce unwanted sound reflections and external noise. Effective room treatment helps you achieve clearer voice recordings, essential for music mixing and live sound applications. Use thick acoustic panels or foam on walls to absorb sound waves and minimize echo. Bass traps in corners control low-frequency issues that can muddy your recordings. Consider diffusers to scatter sound evenly and prevent dead spots. Cover reflective surfaces like windows and hard floors with rugs or curtains. These adjustments create a controlled environment, reducing room coloration and external noise interference. Proper acoustic treatment makes your recordings sound professional and less reliant on additional mics or post-production corrections.
How Proper Room Treatment Enhances Your Recording Workflow

Proper room treatment can considerably boost your recording workflow by minimizing unwanted echoes and background noise. When you focus on creative soundproofing and enhancing acoustic aesthetics, your recordings become clearer and more professional. This makes editing easier and faster, saving you time.
To optimize your space, consider:
- Using diffusers and absorbers strategically to control sound reflections.
- Incorporating decorative elements that double as acoustic panels for a stylish look.
- Sealing gaps and leaks to prevent sound from escaping or entering the room.
These steps improve sound quality without sacrificing visual appeal, creating an environment conducive to consistent recordings. Proper room treatment not only enhances sound but also streamlines your workflow, making every session more efficient.
Room Treatment vs. Microphone Upgrades: Which Offers Better Value?

When weighing the benefits of room treatment versus microphone upgrades, it’s crucial to evaluate which offers the most noticeable improvement for your setup and budget. Room treatments like soundproofing door treatments and strategic placement can markedly reduce unwanted noise and echo. Creative microphone placement can often yield better sound quality than simply upgrading mics, especially in untreated spaces. Upgrading mics can help, but if your room isn’t controlled acoustically, the gains are limited. Consider this comparison:
| Aspect | Room Treatment | Microphone Upgrade |
|---|---|---|
| Cost | Often more affordable long-term | Can be expensive |
| Effectiveness | Improves overall sound environment | Enhances mic quality |
| Flexibility | Adaptable with placement strategies | Limited to mic specs |
| Long-term value | Lasts and benefits many recordings | Sometimes less versatile |
Prioritize treatments that optimize your space before investing heavily in new mics.
Quick Fixes and Long-Term Strategies for Great Podcast Acoustics

Achieving great podcast acoustics doesn’t require expensive equipment; instead, focusing on quick fixes and long-term strategies can make a significant difference. Start with simple solutions like adding soundproof curtains to block outside noise and reduce echo. Next, invest in acoustic panels to absorb sound reflections within your space, improving clarity. For sustainable improvements, consider these strategies:
- Rearrange furniture and equipment to minimize sound bounce.
- Use soundproof curtains in windows and doorways for added noise control.
- Regularly update and maintain acoustic panels to keep sound quality ideal.
Combining quick fixes with these long-term strategies creates a balanced approach that elevates your podcast’s sound quality without breaking the bank.
Frequently Asked Questions
How Can I Identify the Most Problematic Areas in My Podcast Room?
To identify problematic areas in your podcast room, start by recording a test session and listening for echo and unwanted noise. Pay attention to where the sound reflects most, causing echo reduction issues. Use soundproofing techniques like placing foam panels or diffusers in those spots. Walk around your space with a microphone and note where audio sounds dull or echoey, so you can target your treatment effectively for better sound quality.
What Are the Best Materials for DIY Acoustic Treatments?
You need materials that turn your room into a sound absorption fortress! Use thick foam panels, heavy curtains, or even DIY bass traps with rockwool or mineral wool to soak up echoes. For diffusion, think about adding bookshelves or uneven surfaces to scatter sound waves. These materials, combined with smart diffusion techniques, crush unwanted reflections and make your recordings crystal clear—no fancy mics required!
How Does Room Shape Influence Sound Quality in Podcasting?
Your room shape considerably impacts sound quality by influencing sound reflection and room resonance. Irregular shapes help scatter sound waves, reducing echo and making your recordings clearer. Conversely, rectangular rooms can cause standing waves, creating uneven sound. To improve audio, avoid parallel walls and consider adding diffusers or acoustic panels, especially in corners. Proper room shape management minimizes unwanted resonance, ensuring your podcast sounds professional and polished.
Can Furniture Placement Improve Room Acoustics Naturally?
Yes, furniture arrangement can naturally improve your room’s acoustics. By strategically placing soft furniture like couches or rugs, you create an acoustic balance that absorbs echoes and reduces sound reflections. Keep larger pieces away from direct sound paths, and use angled furniture to diffuse sound waves. Proper furniture placement helps you achieve clearer, more professional-sounding recordings without additional equipment, making your podcast sound more polished and engaging.
What Are Cost-Effective Ways to Test Room Acoustics Regularly?
Forget fancy gadgets—testing your room’s echo reduction and sound absorption can be as simple as clapping loudly or snapping your fingers. Record your voice or sounds with a smartphone app, then listen for uneven echoes or muffled spots. This quick, cost-effective method helps you identify problem areas and track improvements over time, ensuring your space sounds good without breaking the bank on high-end gear.
Conclusion
Investing in room treatment transforms your podcasting space into a sonic sanctuary, turning chaos into crystal-clear clarity. Instead of constantly chasing the latest mic, you’ll discover that mastering your room’s acoustics is like wielding a magic wand—dramatically boosting your sound quality without breaking the bank. With simple DIY tricks and thoughtful setup, you’ll create a podcast environment so pristine, it’s as if your voice is floating on a cloud of perfection, enthralling listeners every time.